Dreamweaver allows you to connect / interface to your web site in several ways. Most people that use Dreamweaver either work locally and transmit their updates to the server (via FTP) or directly connect via RDS (ColdFusion), or WebDAV. The Dreamweaver help files are fairly comprehensive and duplicating the content of their help files on this page would be superfluous.
We will give basic instructions on how to connect the most common way, via FTP. Most people configure their Dreamweaver to update and create content locally and send changes at certain completion points up to the server.
The instructions below are used to let dreamweaver know how to access a Mindwatering FTP-based web site.
Starting a New Web Site:
Note: Choose the "Basic" option to fill in your connection info and test your connection (step 3, then 7-12) in a wizard mode. Choose the "Advanced" option for more control and more options.
 Basic Screens:
 Basic Screens:
Basic Screens:

Screen 1 - Enter Site Name
(This is any descriptive name that means something to you.)
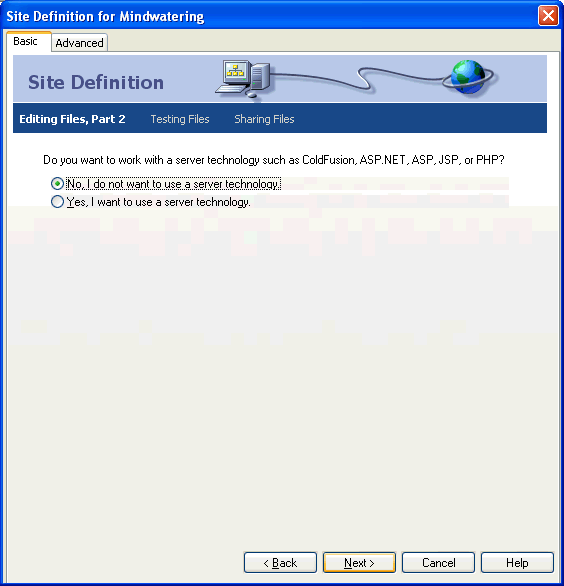
Screen 2 - Choose No, if not using a dynamic server technology.
(If you don't know what these are, the right answer is "No".)
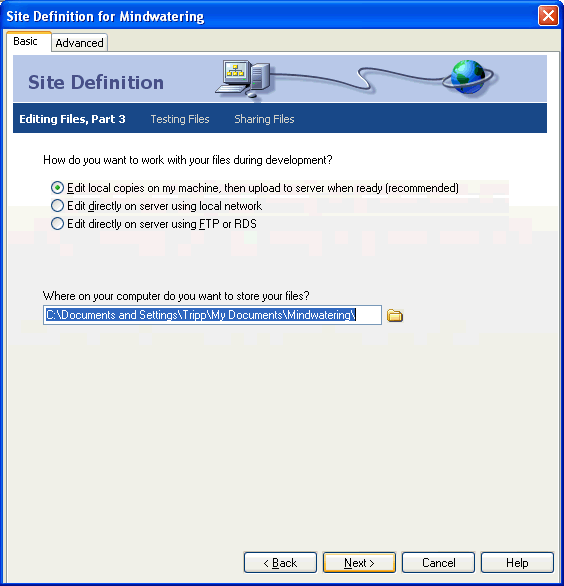
Screen 3 - Choose the top option to work on your files over time and then have them display on your web by publishing.
(Choose bottom (3rd option) only if you are very comfortable that you will not "hose" you web site by your editing.)
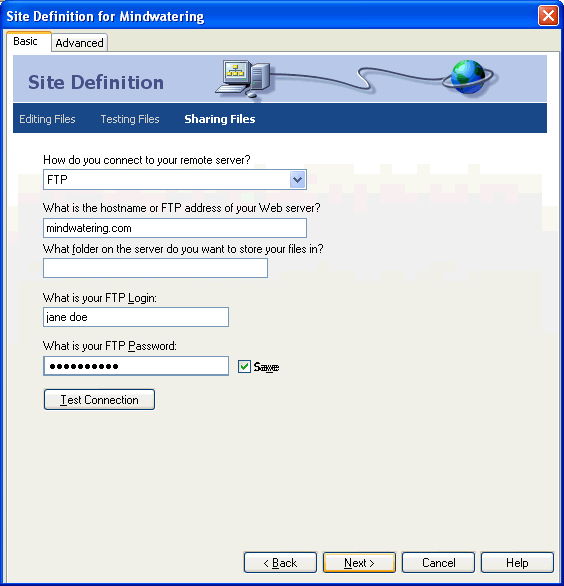
Screen 4 - Select FTP. Enter your domain name, your Login username and your password.
(Press the "Test Connection" button to test. If this errors out, your publishes to the server will, too.)

Screen 5 - Enable check-out if you are working in a team environment where more than one of you will edit pages at the same time.
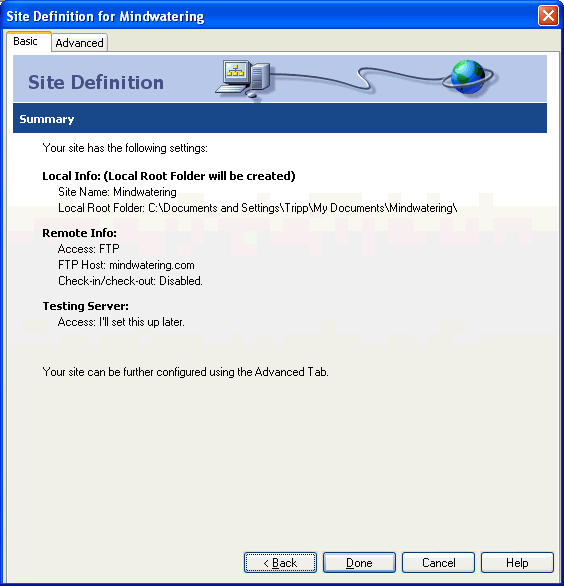
Screen 6 - Press the "Done" button to save your setup.
Advanced Screens:
Advanced Screens:
- Start Dreamweaver MX.
- Under "Site" on the menu bar choose "New Site" to bring up the new site dialog window.
- Local Info Section (see image below)
Beside "Site Name", enter a name for this web site (this a name that means something to you. It does not display on your finished site).
- Change the "Local Root Folder" if you desire to do so or to set the working folder to an existing local web site in progress.
- Beside "HTTP Address", enter your domain name. (e.g. http://www.mindwatering.com)
- Change the other fields as neccessary.
- Remote Info Section (see image below)
Beside "Access", Change "None" to "FTP"
- Beside "FTP Host", enter your domain name (e.g. mindwatering.com).
- Beside "Host Directory", you can enter www, unless we tell you otherwise.
- Beside "Login", enter your username (e.g. JDoe)
- Beside "Password", enter your password (e.g. myPasswd1a), which is case-sensitive.
- Press the "Test" button. If you get an error, check your spellings on the host, login and password fields. You may also need to configure your firewall settings if you are behind a network firewall.
- We recommend that if you author in a single session to check the update automatically on save, so you don't have to remember to do so.
- We also recommend you use the check-in and check-out feature if multiple people may be using the web site at the same time.
- The rest of sections deal with other editing and usability functions of Dreamweaver.
- Press the "OK" button to save.


previous page
|